



Drywall Repair is a popular material used in most modern homes and businesses due to its durability and affordability. However, despite its strength, drywall is not immune to damage. From holes and cracks to water stains and dents, drywall can show signs of wear over time. Fortunately, many drywall problems can be repaired quickly and easily with a little know-how and the right materials.
Common Drywall Issues
1. Small Holes (Nail Holes or Dings)
Small holes, often caused by nails, screws, or general wear and tear, are one of the most common drywall problems. These holes are typically no bigger than a dime and are easy to repair.
How to Fix It:
Clean around the hole, removing any dust or debris.
Apply a thin layer of spackle or joint compound to the hole with a putty knife.
Allow it to dry completely (usually 1-2 hours).
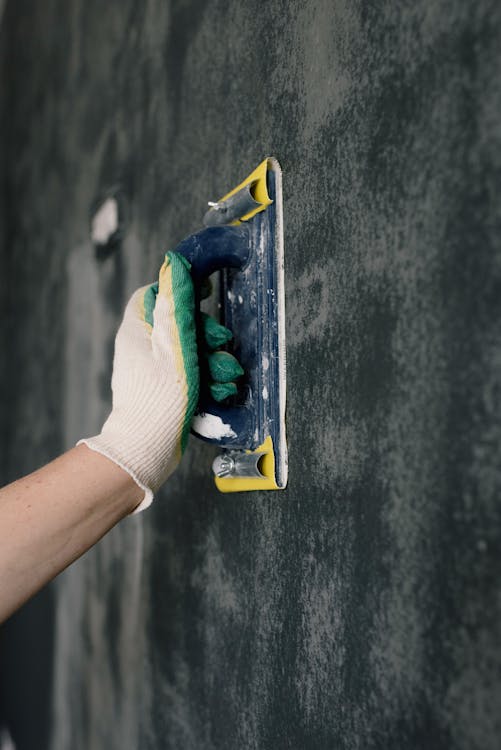
Once dry, sand it smooth with fine-grit sandpaper.
If necessary, apply another layer of compound, let it dry, and sand again.
Once the surface is smooth and even, paint over the patched area to blend it with the rest of the wall.
Tip: For deeper holes, use a patching kit or mesh tape for added support before applying the compound.
2. Large Holes or Cracks
Larger holes, such as those from doorknobs, accidents, or impact damage, require more effort and materials to repair. Cracks, often due to settling or temperature changes, can also be a common issue, especially in older homes.
How to Fix It:
Clean the area around the hole or crack to remove any debris.
For large holes, insert a piece of backing material (such as a piece of wood or a drywall patch) behind the hole to provide a surface for the patch to adhere to.
If it’s a crack, widen the crack slightly using a utility knife to create a clean edge.
Apply mesh tape or drywall patches to the damaged area.
Use joint compound to cover the hole or crack, smoothing it with a putty knife.
Allow the compound to dry completely, then sand smooth.
Apply additional layers of joint compound as needed, sanding between each layer for a seamless finish.
Once the surface is smooth, paint over the area to match the rest of the wall.
Tip: If the crack is wide or deep, consider using a stronger, thicker joint compound for added support.
3. Water Damage or Stains
Water stains on drywall are common in areas prone to moisture, such as bathrooms, kitchens, or basements. They often occur due to leaks in pipes, roofs, or windows. While the stain itself is unsightly, it may indicate a larger issue with your plumbing or roof that needs to be addressed first.
How to Fix It:
Identify and repair the source of the water leak to prevent further damage.
Once the source is fixed, allow the wall to dry completely before proceeding.
Use a mild detergent and water to clean the affected area.
If the stain persists, use a stain-blocking primer to seal the area.
After the primer has dried, apply joint compound over the area to smooth it out.
Sand the surface and paint it to match the rest of the wall.
Tip: Water stains often result in mold growth, so be sure to inspect the area for mold before starting repairs. If mold is present, take proper safety precautions and treat the affected area with a mold remover.
4. Dents and Dings
Dents or dings in drywall can happen due to accidents, bumps, or poor handling of furniture or heavy objects. These can be unsightly and may even cause structural problems if not addressed.
How to Fix It:
Use a putty knife to apply a layer of joint compound or spackle to the dent.
Smooth it over the dent, ensuring the compound is flush with the surface of the wall.
Allow the compound to dry, then sand it smooth.
Apply additional layers of compound if necessary, allowing each layer to dry completely before sanding.
Once the surface is even, paint over the area to match the wall color.
Tip: For deep dents, you may need to apply a drywall patch first before applying compound to fill the gap.
5. Sagging Drywall
Sagging drywall is often a result of poor installation, moisture exposure, or the aging of the drywall. This problem can cause the ceiling or wall to become uneven or look unsightly.
How to Fix It:
Remove the sagging section of drywall, cutting around the edges to ensure a clean removal.
Install a new piece of drywall to fit the space.
Secure the new drywall with drywall screws or nails, ensuring it is flush with the existing wall or ceiling.
Apply joint compound over the seams and screw/nail holes.
Sand the area smooth and apply additional layers of compound as needed.
Once smooth, paint over the area to blend with the rest of the wall or ceiling.
Tip: To avoid sagging in the future, ensure that the drywall is installed correctly with the proper support, especially on ceilings.
Conclusion
Drywall issues are a common part of homeownership and business maintenance, but they don’t have to be overwhelming. Many common problems, from small holes to larger cracks, can be fixed quickly and easily with the right materials and techniques. By addressing issues promptly, you can maintain the aesthetic appeal and structural integrity of your walls.
If the damage is extensive or you are unsure about performing the repair yourself, it’s always a good idea to contact a professional drywall contractor to ensure a smooth and seamless repair. Whether you’re doing a DIY fix or hiring a pro, taking care of your drywall will keep your home or business looking great for years to come.
FAQs
Can I repair drywall myself, or should I hire a professional?
Small to medium repairs, such as fixing small holes or cracks, can often be done by DIYers with the right tools. However, larger repairs or issues involving structural problems should be handled by a professional.
How do I prevent water stains from reappearing?
Always address the root cause of water damage, such as leaks from pipes or the roof, before repairing the drywall. After fixing the leak, use a stain-blocking primer to prevent future stains from seeping through.
How long does it take for joint compound to dry?
Joint compound typically takes about 1-2 hours to dry, depending on the thickness of the layer. However, it’s important to wait for it to dry completely before sanding and applying additional layers.
What’s the best way to sand drywall after repair?
Use fine-grit sandpaper (around 220-grit) to smooth the surface. Sand gently to avoid damaging the surrounding area and wear a dust mask to protect yourself from drywall dust.
Is it necessary to use a primer before painting drywall repairs?
Yes, applying a primer before painting helps seal the patched area, ensuring that the paint adheres properly and that the repaired section blends seamlessly with the rest of the wall.